
To set up your own home security camera system, start by identifying vulnerable spots around your property and plan camera placement for ideal coverage and lighting. Choose durable, high-resolution cameras with night vision that suit indoor or outdoor needs, and decide if wired or wireless connections work best. Mount cameras securely, adjust angles for clear views, and connect them to your network. Test and fine-tune settings to guarantee reliable monitoring—continue exploring how to make your system even smarter.
Key Takeaways
- Plan camera placement by identifying vulnerable points and determining coverage needs for effective security.
- Select suitable outdoor or indoor cameras with high resolution, wide field of view, and night vision features.
- Mount cameras securely on stable surfaces, adjusting angles for optimal coverage and clear footage.
- Connect cameras to your network via wired or wireless methods, ensuring stable connectivity and secure settings.
- Regularly test, maintain, and update your system to ensure reliable operation and clear, actionable footage.
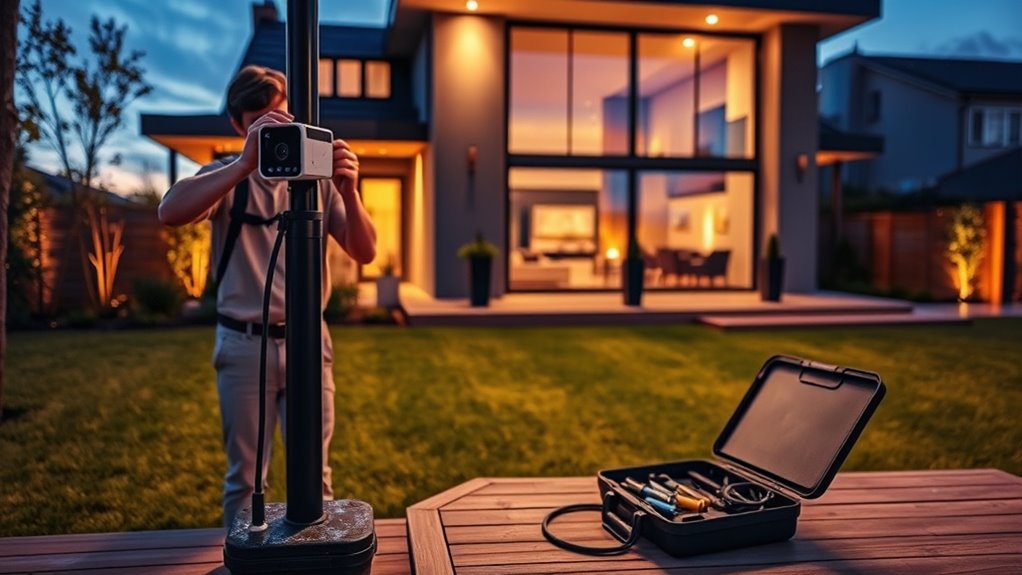
Planning Your Security Camera System
Before installing security cameras, you need a clear plan to guarantee you cover all critical areas effectively. Start by identifying your property’s most vulnerable points—entryways, windows, driveways, and blind spots. Map out these areas to determine the ideal camera placement, keeping in mind the camera’s field of view and lighting conditions. Think about how many cameras you’ll need to avoid gaps in coverage. Consider the purpose of each camera—whether for deterrence, evidence collection, or monitoring specific zones. Establish a timeline for installation and ensure you have access to power sources and Wi-Fi connectivity. Planning thoroughly now prevents costly adjustments later and helps you create a cohesive, effective security system tailored to your home’s unique layout. Incorporating evidence-based placement strategies can further enhance your system’s effectiveness. Additionally, understanding how water-related safety features can protect your property during adverse weather can be a valuable component of your overall security plan. It’s also beneficial to review security zone guidelines to optimize your camera coverage and ensure comprehensive protection. Considering environmental factors like weather conditions can help you select the most durable equipment for outdoor use. Furthermore, researching best camera options can guide you in choosing devices with the right features for your needs.
Choosing the Right Equipment
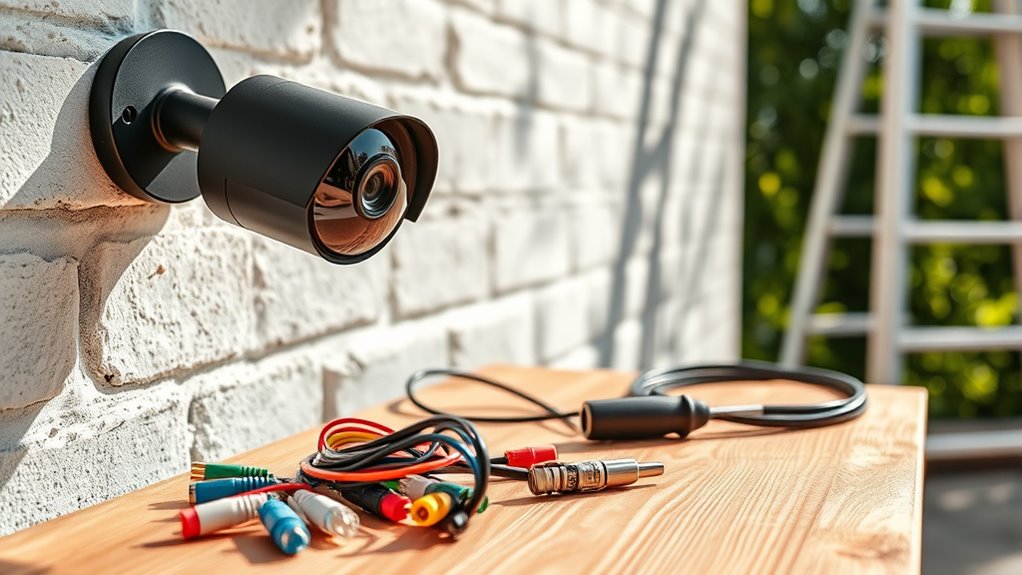
Selecting the right security equipment is essential to guaranteeing your system is effective and reliable. You need cameras suited to your specific needs, whether for outdoor durability or indoor clarity. Consider resolution, field of view, and night vision capabilities. Think about whether wired or wireless options fit your setup best. Additionally, understanding wiring basics can help ensure proper installation and long-term performance. Proper wiring can also influence the connectivity stability of your system. Also, consider the camera placement to maximize coverage and minimize blind spots. For optimal results, take into account environmental factors that might affect camera performance, such as weather or lighting conditions. It’s also helpful to assess power options to ensure continuous operation of your cameras. Here’s a quick guide:
| Feature | Consideration | Benefit |
|---|---|---|
| Resolution | At least 1080p | Clear, detailed footage |
| Field of View | Wide angle (120°+) | Cover more area with fewer cameras |
| Night Vision | Infrared LEDs | See clearly in darkness |
| Connectivity | Wi-Fi or wired | Reliable streaming |
| Storage | Cloud or local (SD card) | Access footage easily |
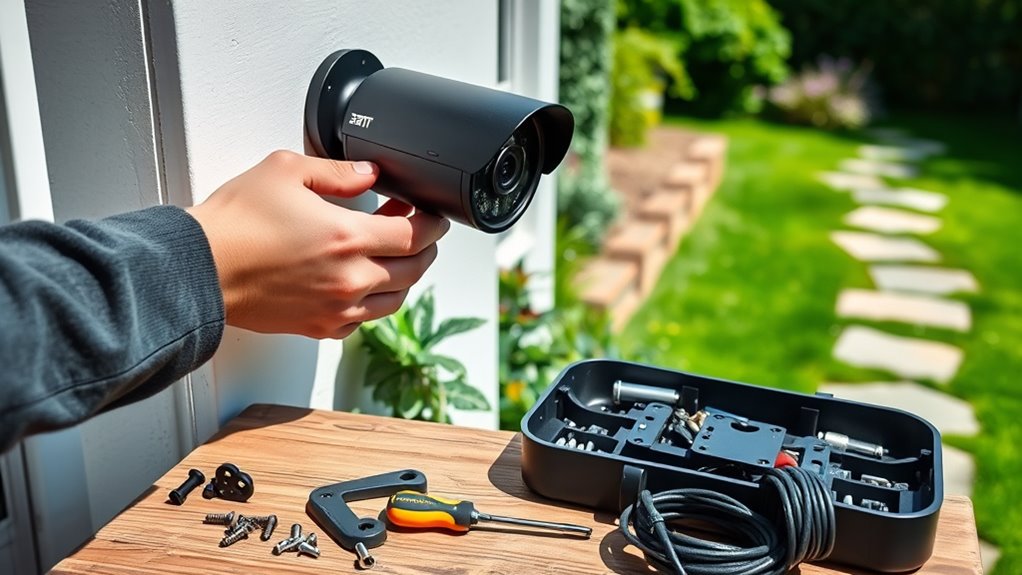
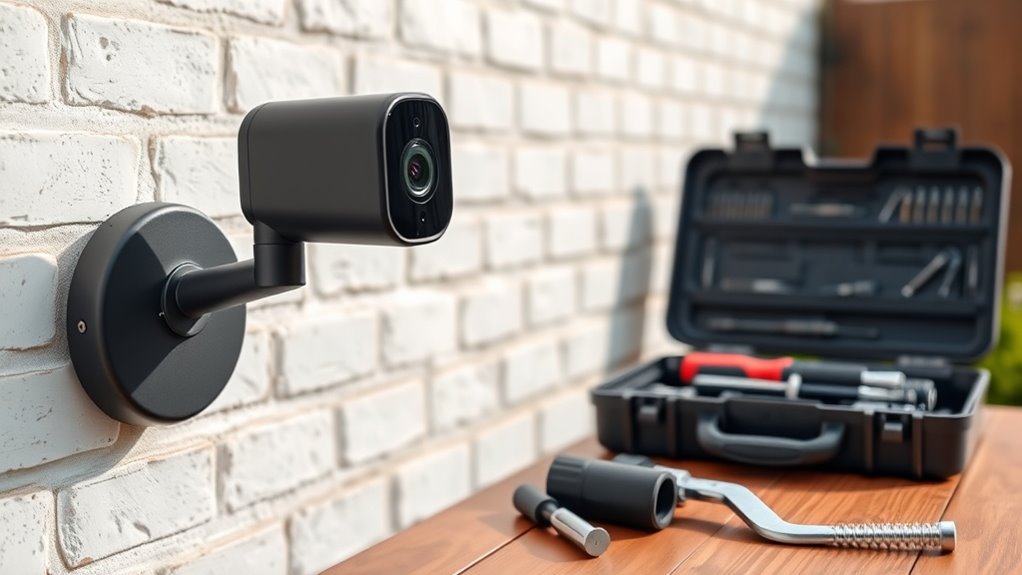
Installing Your Cameras

When installing your cameras, you need to mount them securely in ideal spots. Make sure you’re adjusting the angles so they cover the desired areas effectively. Proper positioning is key to getting clear footage and maximizing your security. Additionally, consider creating simple systems that are easy to maintain, ensuring your home stays secure with minimal ongoing effort. Using drone insights can help you identify the best vantage points and improve camera placement for comprehensive coverage. To enhance your setup, researching navigation and mapping strategies can optimize camera angles and coverage zones for better security. Incorporating reliable wiring techniques can also prevent connectivity issues and ensure your cameras operate smoothly over time. Focusing on digital asset management best practices can further improve the security and efficiency of your home surveillance system.
Mounting Camera Properly
To guarantee your security cameras provide clear and reliable footage, you need to mount them correctly. Choose stable surfaces like walls or soffits that can support the camera’s weight. Use the mounting brackets and screws supplied with your camera, ensuring they’re tight but not overtightened, which could damage the device. Position the camera at a height that prevents tampering and vandalism but still captures the desired area. Keep the lens unobstructed by trees, wires, or other objects, and avoid placing cameras facing direct sunlight, which can cause glare. Make sure the camera is level and securely attached to avoid shifts or falls over time. Proper mounting sets the foundation for effective surveillance, ensuring your camera captures high-quality footage consistently. Additionally, correct camera placement is crucial for optimal coverage and minimizing blind spots. Properly camera alignment also helps prevent distortion and ensures consistent footage quality over time, especially when considering camera positioning for comprehensive security coverage. Ensuring the camera’s stability and durability can prolong its lifespan and reduce maintenance needs. Selecting a mounting surface with low vibration can further enhance footage stability and clarity.
Adjusting Camera Angles
Ever wonder how to get the best view from your security camera? Adjusting your camera angles correctly ensures maximum coverage and clarity. First, position the camera slightly downward to capture people’s faces and license plates. Second, avoid pointing the camera directly at bright lights or windows, which can cause glare or overexposure. Third, test different angles by viewing live footage as you make adjustments, ensuring you cover the desired area without blind spots. Remember, small tweaks can make a big difference in the quality of your footage. Use an adjustable mount or swivel head to make fine adjustments easily. Consulting privacy policies can help you understand how your camera setup may impact your data security and compliance. Additionally, regularly checking your footage helps identify any blind spots or issues with your setup. Ensuring that your camera placement aligns with your security goals will maximize your effectiveness and keep your home safer.
Connecting and Configuring Your System
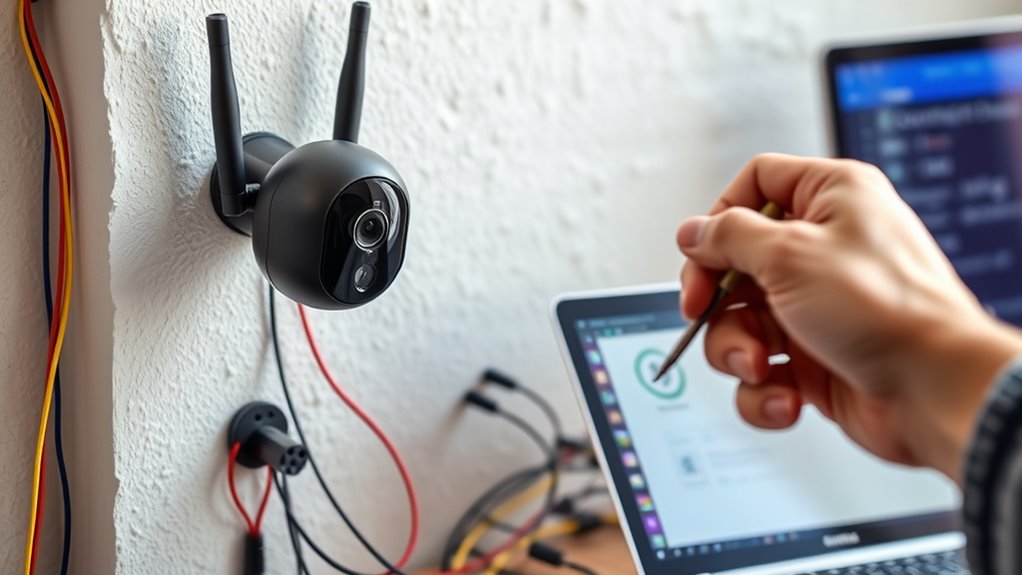
Now that your cameras are installed, it’s time to connect and configure your system. You’ll need to set up your network connection, follow specific device configuration steps, and address any common issues that come up. Staying organized during this process guarantees your security system works smoothly and reliably.
Network Connection Setup
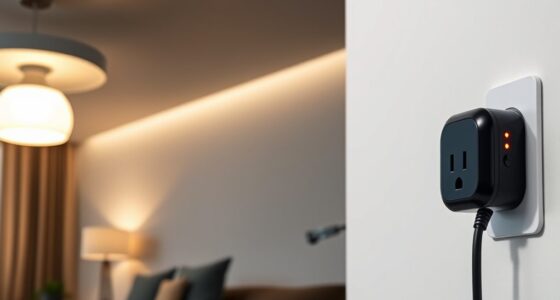
Setting up the network connection is a crucial step in configuring your home security system. First, verify your Wi-Fi or Ethernet connection is stable and fast enough to handle video streams. Next, follow these key steps:
- Connect your camera to the network using either Wi-Fi or an Ethernet cable.
- Access your camera’s setup interface via a web browser or app.
- Enter your network details, like SSID and password, to establish a secure connection.
Double-check that your router’s settings allow device communication and that your firewall isn’t blocking the camera’s access. A reliable network ensures smooth footage transmission and alerts. Once connected, proceed to test the system’s connectivity and adjust settings if needed for peak performance.
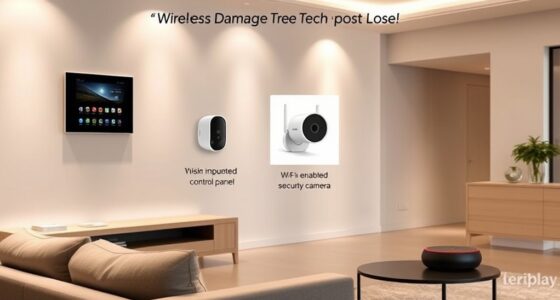
Device Configuration Steps
After confirming your network connection is stable, the next step is to connect your security devices and configure their settings. Begin by powering on each camera and ensuring they’re within range of your Wi-Fi network. Use the manufacturer’s app or web interface to add each device, following prompts to detect and connect them. Once connected, access the device settings to customize options like motion detection sensitivity, recording schedules, and alert preferences. Assign unique names to each camera for easy identification. Check that each device has a stable connection and responds correctly. Update firmware if prompted, to guarantee top performance and security. Confirm all settings are saved. With devices connected and configured, you’re ready to move on to testing their functionality.
Troubleshooting Common Issues
Connecting and configuring your home security devices can sometimes present unexpected challenges, but addressing common issues promptly ensures your system functions smoothly. If your camera isn’t connecting, start by checking your Wi-Fi signal strength and ensure your device is within range. For setup problems, reset your camera and reconfigure it from scratch. If your footage is blurry or laggy, verify your internet bandwidth and close unnecessary apps that might be hogging bandwidth.
To troubleshoot effectively:
- Confirm your device is powered and connected to Wi-Fi.
- Restart your router and camera if needed.
- Update firmware and app software regularly.
These steps help resolve most connectivity and configuration issues efficiently, keeping your system reliable and secure.
Testing and Adjusting Your Cameras

Have you tested your cameras to guarantee they capture clear, accurate footage? Start by viewing the live feed from each camera and checking for clarity, focus, and proper exposure. Make sure the lens is clean and unobstructed. Adjust the camera angles to cover the desired areas without blind spots. If your camera offers zoom or pan features, fine-tune these settings to get the best view. Walk through the monitored space during testing to confirm that motion detection triggers recordings correctly. Check the footage quality at different times of day to ensure visibility under various lighting conditions. Make adjustments as needed, whether that’s repositioning a camera or tweaking settings, until you’re confident each camera provides reliable, clear footage of your property.
Maintaining and Monitoring Your Setup
Regularly maintaining and monitoring your security setup is essential to guarantee it functions effectively over time. To keep your system in top shape, follow these steps:
Routine security checks ensure your system stays reliable and effective over time.
- Check camera footage regularly to ensure the recordings are clear and aren’t corrupted.
- Update firmware and apps promptly to fix bugs and improve security.
- Test your cameras and alerts monthly to confirm they’re working properly and capturing the right areas.
Frequently Asked Questions
How Do I Ensure My Camera System Is Burglar-Proof?
To make your camera system burglar-proof, you should use strong, unique passwords for all devices, enable two-factor authentication, and regularly update your firmware. Position cameras out of burglars’ reach and consider vandal-proof models. Secure your Wi-Fi network with a strong password and encryption. Keep backups of footage in a secure cloud service or off-site location. Finally, add visible signs indicating surveillance to deter potential intruders effectively.
Can I Integrate My DIY System With Professional Security Services?
Yes, you can integrate your DIY system with professional security services. Check if your cameras support third-party integrations or have open APIs. Many modern systems offer compatibility with alarm monitoring services or can be connected via smart home hubs. You’ll need to set up notifications and guarantee your system can communicate with the service provider. This way, you get professional monitoring alongside your DIY setup for added security.
What’s the Best Way to Store Recorded Footage Securely?
Your recorded footage is like treasure—protect it wisely. To keep it secure, choose encrypted cloud storage or a dedicated, password-protected external hard drive. Regularly update your passwords and enable two-factor authentication to guard against unauthorized access. Avoid leaving footage on unsecured servers or local devices vulnerable to theft or hacking. Think of it as locking your valuables in a safe, ensuring your home’s security is airtight and private.
How Do I Update the Firmware on My Camera System?
You can update your camera system’s firmware by first checking the manufacturer’s app or website for the latest version. Download the update to your device, then follow the instructions carefully—usually, you’ll connect your camera to Wi-Fi or via USB. Make sure your camera is powered on, and don’t interrupt the process. Once the update completes, restart your camera to guarantee the new firmware is properly installed and functioning.
Are There Legal Considerations for Outdoor Surveillance in My Area?
Yes, you need to check local laws before installing outdoor surveillance. You’re responsible for respecting others’ privacy rights, so avoid pointing cameras at neighbors’ properties or public spaces. Some areas require signs indicating surveillance, and there may be restrictions on recording audio. To stay compliant, research your city or state regulations, and consider consulting a legal expert if you’re unsure. Staying informed helps prevent legal issues down the road.
Conclusion
With your DIY security system in place, you’ve built a watchtower that quietly guards your home like an ever-vigilant lighthouse. Keep it maintained and regularly checked, and it’ll continue to shine its light on potential threats, guiding you safely through the night. Remember, your effort transforms your space into a fortress, where peace of mind becomes a natural part of everyday life. Stay attentive, and your security will stand strong against anything that comes your way.