Cloning your hard drive lets you upgrade to a bigger disk without reinstalling your OS or apps. You simply back up, select reliable cloning software, connect your new drive, and copy everything exactly as it is. This process saves time, preserves all files, and guarantees a seamless shift. Once cloned, you’ll just need to set the new drive as your boot device and confirm everything works smoothly. Keep going to discover each step in detail.
Key Takeaways
- Choose reliable cloning software compatible with your system and disk types, including SSDs and HDDs.
- Prepare your system by backing up data, cleaning unnecessary files, and verifying disk partition styles.
- Connect the new larger drive securely via appropriate adapters and ensure it is recognized by the software.
- Execute the cloning process, selecting your source and target drives, and customize options like partition resizing if needed.
- After cloning, set the new drive as the primary boot device in BIOS, verify system boot, and confirm data integrity.

Dell Pro Tower Plus Desktop, Intel 14-Core Ultra 5 235, 32GB DDR5 RAM, 1TB PCIe SSD, Windows 11 Pro
Dell Pro Tower Plus Desktop Computers, Intel 14-Core Ultra 5 235, 32GB DDR5 RAM, 1TB PCIe SSD, Windows...
As an affiliate, we earn on qualifying purchases.
Benefits of Cloning Over Reinstalling

Cloning your hard drive offers numerous advantages over reinstalling your operating system. First, it preserves all your files, documents, photos, and system settings exactly as they are, so you don’t have to start from scratch. You save time because you won’t need to reinstall Windows or any other OS, along with all your apps and configurations. This process also minimizes the risk of data loss, which can happen during a fresh install. Plus, cloning transfers your entire system environment in just 15 to 90 minutes, depending on drive size and speed. It’s a seamless way to upgrade to a bigger disk without the hassle of manual setup, giving you an exact replica of your current system on a larger drive. Additionally, understanding navigation and mapping can help ensure the cloning process is smooth and your system functions correctly on the new drive. Mastering hardware compatibility is also crucial to avoid issues with your new, larger disk. Moreover, being aware of sector alignment can improve the performance and longevity of your upgraded storage.

Dell Pro Tower Business Desktop, 14th Gen Intel Core i5-14500 vPro (14-Core/20T), 16GB DDR5 RAM, 512GB PCIe SSD, Intel UHD 770, Windows 11 Pro - for Professional Workstation & Business Productivity
🚀 14th Gen i5-14500 vPro – Business-Grade Processing Power: Powered by the Intel Core i5-14500 vPro (14 cores:...
As an affiliate, we earn on qualifying purchases.
Preparing Your System and Drives

Before starting the cloning process, it’s important to prepare your system and drives to guarantee a smooth and successful transfer. Begin by backing up critical data to cloud storage or an external drive to protect against potential errors. Clean up unnecessary files and uninstall unused programs to streamline the process and reduce transfer time. Verify your disk’s partition style (MBR or GPT) to assure compatibility with the new drive. Update your system firmware and drivers to prevent compatibility issues and improve performance. If your computer lacks spare drive bays, connect your new disk via SATA-to-USB or NVMe-to-USB adapters. These steps help guarantee a smooth cloning operation, minimizing risks and setting the stage for a seamless upgrade. Additionally, understanding your drive’s compatibility and safety considerations can help prevent unforeseen issues during the upgrade process. It’s also wise to consult your system’s manufacturer documentation to ensure you follow recommended procedures for hardware upgrades. Performing a system health check before beginning can identify underlying issues that might interfere with the cloning process, ensuring optimal conditions for a successful upgrade.
Dell 2026 Tower PC Ect1250 Desktop Computers for Home & Business, Copilot AI, 14th Gen Intel Processor, 16GB DDR5 RAM, 512GB PCIe SSD, WiFi 6, Bluetooth, DisplayPort, HDMI, Type-C, Windows 11 Pro
POWERFUL 14TH GEN PERFORMANCE - Experience lightning-fast computing with Intel Core i3-14100 processor (4-core, 3.5-4.7GHz) and massive 16GB...
As an affiliate, we earn on qualifying purchases.
Selecting the Ideal Cloning Software

When choosing cloning software, you need to take into account its compatibility with your system and hardware. Ease of use is important, so look for tools with clear interfaces and straightforward options. Also, compare costs and licensing models to find a solution that fits your budget and long-term needs. To ensure your data remains safe, consider software that offers reliable backup options and support. Pay attention to the piercing care and hygiene features of the software, which can help prevent data corruption and ensure a smooth cloning process. Additionally, selecting software with system compatibility will help streamline the process and minimize potential issues. Being aware of family photoshoot fails and their humorous mishaps can remind you to back up all your personal data before starting the cloning process. Moreover, choosing software with robust disk management features can facilitate easier partition adjustments during the cloning process.
Software Compatibility Features
Choosing the right cloning software hinges on its compatibility with your system and storage devices. Confirm it supports your operating system version, whether Windows, macOS, or Linux. Check if the software handles different disk types, like HDDs, SSDs, or NVMe drives, to avoid connection issues. Verify support for your partition style—MBR or GPT—to guarantee smooth cloning. Look for features like sector-by-sector copying and SSD optimization, which improve accuracy and performance. Compatibility with various file systems, such as NTFS, FAT32, or APFS, is also essential. Additionally, confirm the software can handle custom partition resizing if needed. By choosing software tailored to your hardware and system configuration, you minimize risks and guarantee a seamless cloning process. Understanding the importance of quality assurance helps ensure reliable results during the cloning process. A thorough appliance maintenance plan can also help keep your system components in optimal condition, reducing potential issues during hardware upgrades or replacements.
Ease of Use Options
Selecting the right cloning software depends on how easy it is to navigate and perform essential tasks. You want a tool with a clear interface that guides you step-by-step through source selection, destination setup, and cloning options. Look for features like one-click cloning, automatic partition resizing, and real-time progress updates to simplify the process. Compatibility with your system and drives also matters. The table below highlights key ease-of-use features:
| Feature | Benefit |
|---|---|
| Intuitive User Interface | Reduces learning curve, speeds up cloning process |
| Automated Partition Adjustment | Ensures proper drive setup without manual input |
| Progress Monitoring | Keeps you informed, prevents accidental interruptions |
Choose software that balances simplicity with control, making your cloning experience smooth and efficient.
Cost and Licensing
The cost and licensing options of disk cloning software vary widely, influencing your choice based on your budget and needs. Free tools like Macrium Reflect and AOMEI Cloner offer reliable features without cost, perfect for straightforward cloning. Paid options, such as Acronis True Image, provide advanced capabilities like incremental backups and tech support, but come with a price. Some software offers one-time purchases, while others require subscriptions, affecting long-term expenses. Consider these points:
- Free versions often support basic cloning functions
- Paid licenses may include additional features and customer support
- Subscription models provide ongoing updates and services
- Compatibility across different operating systems varies by software
- When selecting cloning software, software reliability should be a key consideration to ensure data integrity during the process. Incorporating licensed software with proven track records can help prevent potential data loss or corruption.
Evaluate your needs carefully to select the most cost-effective solution that meets your cloning requirements, and review the license types to ensure you choose the right plan for your situation.
HP Pro Tower 290 G9 Business Desktop Computer, Intel i5-12500 up to 4.6GHz, 16GB RAM, 512GB PCIe SSD, Wi-Fi 6, Bluetooth 5.3, Dual Monitor Support, Windows 11 Pro, Carbon Black
Powerful 12th Gen Intel Performance: Intel Core i5-12500 6-core processor (up to 4.6GHz Turbo) with 18MB cache delivers...
As an affiliate, we earn on qualifying purchases.
Connecting Your Drives Correctly

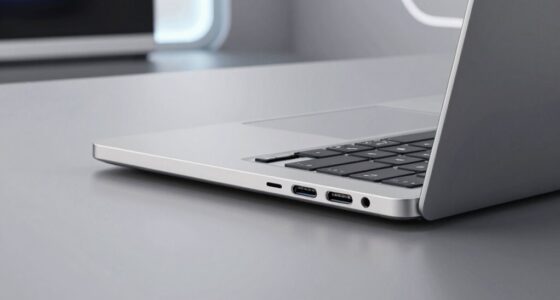
Connecting your drives correctly is crucial for a smooth cloning process. First, identify the source drive, which contains your current data, and connect it to the designated source port on your computer or duplicator. Next, connect the new, larger drive to the target port, making sure it has enough capacity for all your data. Use compatible connections, such as SATA or NVMe, to prevent hardware issues. If your system lacks spare drive bays, employ external adapters like SATA-to-USB or NVMe-to-USB to connect the drives externally. Make certain both drives are securely connected and recognized by your system before proceeding. Proper connection ensures data integrity during cloning and helps avoid errors or hardware conflicts throughout the process. Additionally, understanding hardware compatibility can help ensure your drives function correctly together during the cloning process.
Executing the Cloning Process

Ready to start the cloning process? First, launch your chosen software and select your current drive as the source. Next, pick your new larger disk as the destination and confirm it has enough space. Before beginning, customize options like partition resizing or SSD optimization if available. Then, click the clone or start button to initiate the process. During cloning, you’ll see a progress bar with an estimated completion time based on data size and drive speed. Keep an eye on this to guarantee everything runs smoothly. Remember, the entire process typically takes between 15 and 90 minutes. Understanding the importance of disk cloning can help ensure a smooth upgrade. Once finished, double-check that the clone completed successfully and that all files and partitions are intact. This sets the stage for boot configuration and verification.
Verifying the Clone and Configuring Boot Settings

Once you’ve completed the clone, you need to verify that all your data is intact and accessible. To do this, carefully explore your backup data to confirm everything has been transferred correctly. It’s also a good idea to run a disk health check to ensure the new drive is functioning properly and free of errors. Additionally, checking the partition alignment can help optimize performance and longevity of the new disk. Next, you’ll enter your BIOS or UEFI settings to set the new drive as the primary boot device. Checking the boot order ensures that your system recognizes the new disk as the startup drive. Finally, restart your computer to ensure it boots smoothly from the cloned drive without issues. To maintain a calmer, more functional home, it’s helpful to organize your workspace so that managing these technical tasks feels less overwhelming.
Confirm Data Integrity
After completing the cloning process, it’s essential to verify that all your data has transferred correctly and the system functions properly. You want to confirm that your files, applications, and OS are intact and accessible. To do this, connect the cloned drive and perform these checks:
- Open key folders and verify essential files are present.
- Launch critical applications to ensure they run without issues.
- Check system settings and preferences for consistency.
- Boot from the cloned drive to confirm it starts correctly and loads Windows or your OS.
This step guarantees the clone is complete and bootable. If anything appears missing or malfunctioning, you may need to repeat the cloning process or troubleshoot potential errors before proceeding. Proper verification prevents future data loss or boot problems. Additionally, understanding connected devices and how they interact with your system can help identify unexpected issues that might arise after cloning.
Adjust Boot Priority
To guarantee your system boots correctly from the cloned drive, you’ll need to adjust the boot priority settings in your BIOS or UEFI firmware. Restart your computer and enter the BIOS or UEFI menu by pressing F2, F12, DEL, or another key during startup—check your manufacturer’s instructions if needed. Navigate to the boot options or boot order menu. Locate your new cloned drive and set it as the first boot device. Save your changes and exit. Your computer will then attempt to boot from the new drive. If it starts up normally, you’ve successfully configured the boot priority. If not, double-check the drive connections and ensure the clone was complete. This step is vital to make your upgraded drive your primary boot device.
Final Steps for a Seamless Upgrade

Completing the cloning process is just the beginning; the final steps guarantee your upgrade is seamless and reliable. First, connect the cloned drive to your computer and verify that all files and partitions are intact. Next, enter BIOS or UEFI settings to set the new drive as the primary boot device. Once confirmed, remove the old drive to prevent boot conflicts. Finally, restart your system and test its stability, making certain all applications open correctly and files are accessible. To make this smooth, remember:
Ensure system stability by verifying files, adjusting BIOS, removing old drive, and testing performance thoroughly.
- Double-check boot priority settings
- Remove the original drive cautiously
- Test system performance thoroughly
- Backup important data before finalizing
These steps ensure your upgraded drive functions flawlessly, providing a hassle-free transition to your larger storage capacity.
Frequently Asked Questions
Can I Clone My Encrypted or Bitlocker-Protected Drive?
Yes, you can clone your encrypted or BitLocker-protected drive. First, access the drive by entering your password or recovery key. Once decrypted, use reliable cloning software that supports encrypted drives. The software will copy the entire drive, including encryption data, ensuring your system remains protected after cloning. Afterward, re-enable BitLocker on the new drive to maintain your security. Just make sure to keep your recovery keys safe throughout the process.
Is It Possible to Clone From HDD to SSD Directly?
Did you know that most users experience a 20-30% performance boost when switching from HDD to SSD? Yes, you can clone from HDD to SSD directly. Just connect both drives to your computer using appropriate adapters or internal bays, then use reliable cloning software like Macrium Reflect or AOMEI Cloner. Make certain your SSD has enough capacity. Follow the prompts to duplicate your data, and you’ll enjoy a faster, seamless upgrade.
Will Cloning Affect My Windows Activation Status?
Cloning your drive generally won’t affect your Windows activation status. When you clone, you’re copying the exact system environment, including activation data. As long as you don’t change significant hardware components like the motherboard, Windows usually remains activated. However, if you do replace major hardware, especially the motherboard, Windows might detect a hardware change and prompt reactivation. In most cases, your license remains valid after cloning.
How Do I Handle Partition Alignment After Cloning?
You handle partition alignment after cloning by verifying and adjusting it with disk management tools like Windows Disk Management or third-party software. Failing to align partitions correctly can cause slow performance and wear out your SSD prematurely. To avoid this, check the alignment status immediately after cloning. If misaligned, resize or realign partitions to optimize speed and longevity. Don’t delay—proper alignment keeps your system running smoothly and efficiently.
Can I Clone My System Drive Without Removing It?
Yes, you can clone your system drive without removing it. Connect your new bigger disk via an external adapter or connect both drives internally if possible. Use reliable cloning software to duplicate your current drive directly. Make sure to select the source (your existing drive) and the destination (the new disk). Once cloning finishes, boot from the new drive by adjusting your BIOS settings, then remove the old drive if desired.
Conclusion
Now that you’ve cloned your drive, you’re all set for a smooth upgrade without reinstalling your OS or programs. Imagine booting up your computer on the larger disk and feeling like nothing’s changed—yet having all that extra space. Isn’t it great to upgrade effortlessly? Just double-check everything, and you’ll enjoy your expanded storage with minimal hassle. Ready to experience the simplicity of cloning your hard drive?