
If your PC won’t start or has hardware issues, start by checking power connections and performing a power cycle. Listen for beep codes and visually inspect the motherboard for damage. Test RAM modules individually, reseat all hardware, and update your BIOS if needed. Make certain peripherals work properly by testing them on different systems. Monitoring cooling components is also essential. Keep troubleshooting step-by-step to identify problems quickly—more tips are ahead to help you resolve common hardware challenges.
Key Takeaways
- Check power connections and perform a power cycle to resolve startup issues.
- Listen for POST beep codes and visually inspect the motherboard for damage.
- Reseat RAM modules and run diagnostic tools like MemTest86 for memory problems.
- Test peripherals on different ports or systems to identify faulty devices.
- Monitor system temperatures and clean dust from cooling components to prevent overheating.

Creality K2 Plus Combo 3D Printer, Multi Color Printing with New CFS, Max 600mm/s Printing Speed, Full-auto Leveling, Next-Gen Direct Drive Extruder, Dual Al Camera, Build Volume 350 * 350 * 350mm
Enjoy Printing in Multiple Colors: By hooking up as many as four CFS units together, you are able...
As an affiliate, we earn on qualifying purchases.
Identifying Power and Startup Problems

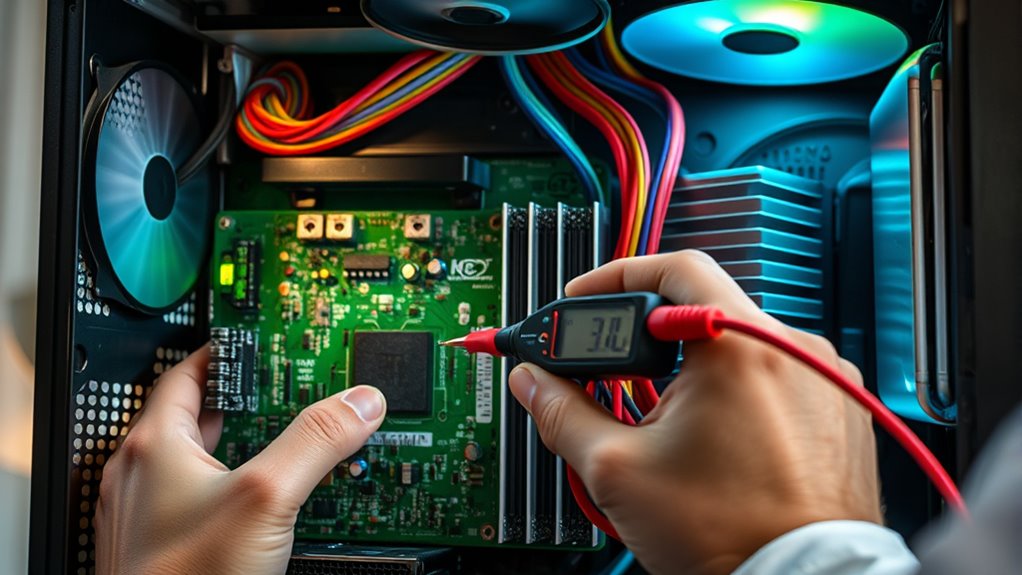
Are you having trouble getting your PC to turn on or stay powered? First, check all power cables and connections to make certain they’re secure. Sometimes, loose cables prevent startup. Try performing a power cycle by shutting down completely, unplugging, and holding the power button for about 30 seconds, then reconnect and turn it on again. Test your power outlet and strip with a known working device to confirm they’re functioning correctly. If your PC still won’t power up, consider testing the power supply with a multimeter to verify consistent voltage output. Additionally, holding down the power button for an extended period, like a minute, can reset stubborn hardware. These steps help eliminate simple issues before moving on to more complex diagnostics. Understanding hardware components can also assist in identifying potential internal issues affecting power. Checking for signs of hardware failure such as unusual noises or smells may help pinpoint specific problems. Paying attention to power supply unit performance and lifespan can prevent unexpected shutdowns or startup failures. Regularly inspecting internal components for dust or damage can further improve overall hardware reliability and prevent power issues.

Creality K2 Plus Combo 3D Printer, Multi Color Printing with New CFS 600mm/s High-Speed Full Auto-Leveling Dual Al Camera Next-Gen Direct Drive Extruder Large Build Volume 13.78x13.78x13.78inch
Multi Color Printing with All-new CFS: K2 Plus Combo multi-color flagship printing, exciting for you to combine. With...
As an affiliate, we earn on qualifying purchases.
Diagnosing Motherboard and RAM Failures

When diagnosing motherboard and RAM failures, start by listening for POST beep codes during startup, as these signals can quickly point to specific hardware issues. If you hear beeps, note their pattern—single or multiple beeps, long or short—as each indicates a different problem. Visually inspect the motherboard for burnt components, bulging capacitors, or physical damage. Confirm all power connectors are tight and properly seated. Reseat all internal components, especially RAM modules, and remove non-essential hardware to isolate faults. Test RAM sticks individually using diagnostic tools like MemTest86 or Windows Memory Diagnostic. If a stick causes errors, replace it with a compatible module. Ensuring proper hardware installation can prevent many common issues. Proper hardware configuration also plays a crucial role in system stability and successful troubleshooting. Regularly updating your firmware and BIOS can resolve compatibility issues and improve hardware detection. Additionally, checking hardware compatibility ensures that components work harmoniously, reducing the likelihood of failure. Performing comprehensive diagnostics can help identify underlying problems that are not immediately evident. Consistent beeps or failed tests usually point to faulty RAM or motherboard issues needing further diagnosis or replacement.

Arcade Classics - Atari Centipede Ultra Series Game Machine, 40 Games, 17" Liquid Crystal Screen - Indoor Cabinet, Retro, Gaming Console, Basement Decoration, Man Cave
Classic Atari Arcade Experience: Relive the fun and play through arcade favorites like Liberator, Avalanche, and Super Breakout...
As an affiliate, we earn on qualifying purchases.
Troubleshooting Peripheral Devices and Cooling Issues

After addressing motherboard and RAM issues, peripheral device failures and cooling problems often surface as common causes of system instability. To troubleshoot, start by testing peripherals like keyboards, mice, and printers on different ports or systems to identify if the device or port is faulty. Next, swap peripherals with known working ones to pinpoint the source of the problem. Check device drivers—update or reinstall them if needed. Finally, inspect cooling components: listen for unusual fan noises, open the case to clean dust from fans and heat sinks, and monitor system temperatures with software. Incorporating connected devices into your troubleshooting can help identify whether issues stem from hardware or software conflicts. Ensuring proper hardware maintenance can prevent many common issues and extend the lifespan of your components.

Creality Ender 5 Max 3D Printer, 700mm/s Max Printing Speed Large 3D Printer, Auto Leveling 300℃ High Temp Precise Linear Rail Dual Z Axis,Build Volume 15.75x15.75x15.75 inch
Large Printing Size: A larger bulid volume means more possibilities and more applications. Ender 5 Max offers a...
As an affiliate, we earn on qualifying purchases.
Frequently Asked Questions
How Can I Detect Faulty Power Supplies Without Specialized Tools?
You can detect a faulty power supply by performing simple tests. First, make certain all cables are securely connected. Next, try powering on your PC with a different outlet or power strip to rule out external issues. If possible, swap in a known working power supply. Watch for system instability, random shutdowns, or failure to power on. If these symptoms persist despite checks, the power supply is likely defective and needs replacing.
What Are the Signs of Motherboard Capacitor Failure?
Did you know that around 80% of motherboard failures involve capacitor issues? Signs of motherboard capacitor failure include visible bulging or leaking capacitors, which look like swollen or crusty tops. You might also experience random system crashes, boot failures, or instability. If your PC exhibits these symptoms, check the motherboard visually for damaged capacitors. Replacing faulty capacitors or the motherboard itself can restore stability and prevent further damage.
How Do I Identify a Defective GPU or Graphics Card?
You can identify a defective GPU by watching for display issues like artifacts, glitches, or crashes during gaming or graphics-intensive tasks. Check for driver errors or warning messages in Device Manager. Listen for unusual noises from the card. Test the GPU in another system if possible, or try a different card in your system. Overheating or failure to display output also signals GPU problems that need attention.
What Troubleshooting Steps Are Recommended for Sound Card Issues?
You should first check if the sound card is properly seated in its slot and all connections are secure. Then, update or reinstall the drivers to fix software issues. Test the sound card on another system or port to rule out hardware failure. Use audio troubleshooting tools or Windows Sound Settings to identify problems. If issues persist, try replacing the sound card to determine if it’s faulty.
How Can I Tell if Overheating Is Damaging Internal Components?
You can tell if overheating is damaging your internal components by monitoring system temperatures with software, watching for unexpected shutdowns, and noticing reduced performance or crashes. Feel for excessive heat around vents and heat sinks, listen for abnormal fan noises, and observe if hardware temperatures exceed recommended limits. Regularly cleaning dust from fans and vents helps prevent damage, while persistent overheating signs indicate potential harm to your CPU, GPU, or other critical parts.
Conclusion
By following these troubleshooting steps, you’ll become the Sherlock Holmes of your PC, swiftly uncovering hardware issues before they escalate. Remember, even the most modern machines can act like they’re from an ancient scriptorium if overlooked. Keep calm, stay methodical, and don’t be afraid to ask for help if needed. With patience and practice, you’ll be diagnosing problems faster than a knight in shining armor—no need to summon Merlin just yet!