
To start live streaming your gameplay on Twitch, create your account, customize your profile, and connect your social media. Set up your hardware with a good microphone, camera, and stable internet, then install streaming software like OBS Studio. Configure your settings for quality and stability, design your scene layout, and do test runs before going live. Focus on engaging with viewers and managing your stream smoothly—continuing will help you master these essential steps.
Key Takeaways
- Create and customize your Twitch profile, including branding, bio, and social media links to attract viewers.
- Set up your hardware and software, ensuring proper environment, lighting, and internet connection for high-quality streams.
- Configure your streaming software with optimal settings for resolution, bitrate, and scene layout for smooth broadcasts.
- Test your stream with a private session to verify quality, stability, and scene transitions before going live publicly.
- Engage actively with viewers, monitor stream health, and use interactive tools to build a loyal streaming community.

TECKNET VR Headset for Phone with Bluetooth Controller, 4.7-7.2" VR Headsets with HD 110°FOV Anti-Blue Light Lenses & Adjustable Gears, 3D VR Headset for Kids Compatible iPhone Samsung Android
Immersive 3D Experience: Put on our VR headset and enter the breathtaking world of immersive 3D virtual reality....
As an affiliate, we earn on qualifying purchases.
Setting Up Your Twitch Account and Profile

To start streaming on Twitch, you need to create an account and set up your profile properly. First, visit Twitch’s website and sign up with a valid email, username, and password. Once registered, customize your profile by adding a profile picture, banner, and bio that reflect your gaming style or personality. Set your moderation rules to maintain a positive community and consider linking your social media accounts to grow your audience. Make sure your account privacy settings are appropriate for your streaming goals. A complete, appealing profile helps attract viewers and establishes your brand. Remember, first impressions matter, so take time to personalize your profile to stand out from other streamers. Incorporating color accuracy into your profile branding can also convey professionalism and attention to detail. Additionally, understanding community guidelines can help ensure your content remains compliant and welcoming. Familiarizing yourself with European cloud standards can also enhance your profile’s credibility, especially if you’re emphasizing secure and reliable streaming setups. Ensuring your profile design aligns with branding consistency can further strengthen your identity as a streamer and attract dedicated followers. Moreover, optimizing your profile for search discoverability can make it easier for new viewers to find your channel.

Meta Quest 3 512GB | Virtual Reality Headset Without Wires — Thirty Percent Sharper Resolution — 2X Graphical Processing (Renewed Premium)
NEARLY 30% LEAP IN RESOLUTION — Experience every thrill in breathtaking detail with sharp graphics and stunning 4K...
As an affiliate, we earn on qualifying purchases.
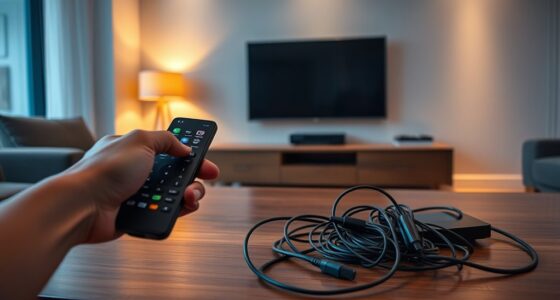
Gathering Essential Hardware and Software Tools

Before you start streaming, you’ll need to gather the right hardware and software tools to guarantee a smooth broadcast. Think of your setup as a control center, with essential components working together. Here’s a quick visual:
| Hardware | Software | Purpose |
|---|---|---|
| PC or console | OBS Studio / Streamlabs | Stream management and capture |
| Microphone | VoiceMeeter / Audio Mixer | Clear audio communication |
| Webcam | Stream overlays | Visual engagement and branding |
Ensure your device has a strong internet connection, and get a capture card if streaming console gameplay. These tools will set the foundation for a professional, seamless stream. Additionally, integrating connected equipment can enhance your setup by enabling real-time data tracking and improving overall stream quality. Properly managing audio quality is also crucial for maintaining viewer engagement and ensuring your message comes through clearly.

Meta Quest 3S 128GB | VR Without Wires — Gorilla Tag Cardboard Monkenaut Bundle — Amazon Exclusive —Access to 100+ Games with a 3-Month Trial of Meta Horizon+ Included
CARDBOARD MONKENAUT — Get our best Gorilla Tag bundle yet with this Amazon exclusive deal. Purchase Meta Quest...
As an affiliate, we earn on qualifying purchases.
Configuring Your Streaming Software for Optimal Performance

To guarantee your stream runs smoothly, you need to fine-tune your video settings and set up your scenes properly. Adjusting resolution, bitrate, and frame rate helps optimize quality without overloading your hardware or internet connection. By configuring these elements carefully, you’ll deliver a seamless viewing experience for your audience. Additionally, understanding outdoor wisdom can inspire creative scene layouts that enhance your streaming content and engage viewers. Moreover, aligning your streaming setup with personality assessment principles can help you better understand your audience preferences and tailor your content to maximize engagement. Incorporating smart technology into your streaming environment can also improve efficiency and allow for more dynamic interactions with viewers. Conducting a safety checklist ensures your streaming space remains secure and free of hazards, especially if you incorporate backup power solutions. Paying attention to hardware compatibility can further prevent technical issues during your streams.
Adjust Video Settings
Adjusting your video settings is crucial for achieving a smooth and visually appealing stream. First, set your base (canvas) resolution to match your gameplay’s native resolution, usually 1080p or 720p. Then, choose an output (scaled) resolution that balances quality and performance; lowering it can improve stream stability on limited bandwidth. Adjust your bitrate; a common range is 4500-6000 kbps for 1080p streams, but make certain your internet upload speed can handle it. Select a keyframe interval of 2 seconds for compatibility with Twitch. Enable hardware encoding if your GPU supports it to reduce CPU load. Finally, tweak your frame rate to 30 or 60 fps depending on your hardware and game requirements for smooth motion. Properly configuring these settings ensures your stream looks professional and runs smoothly.
Set Up Scenes
Setting up scenes in your streaming software is essential for creating a professional and engaging broadcast. You want to organize different layouts for gameplay, chatting, and special events. Start by creating a main scene that includes your game capture and webcam feed, positioning them for ideal visibility. Add additional scenes for “Just Chatting,” with overlays, alerts, and chat windows to interact with viewers. Use sources like images, text, and browser windows to enhance your scenes. Arrange elements logically, ensuring overlays don’t block important visuals. Test each scene to confirm transitions are smooth and visuals are clear. Properly configured scenes keep your stream professional and dynamic, making your broadcast more appealing and easier for viewers to follow.
Optimize Streaming Quality
Optimizing your streaming quality guarantees viewers enjoy smooth and professional broadcasts. To do this, start by adjusting your streaming software’s settings based on your internet speed and hardware. Use the auto-configuration wizard in OBS or Streamlabs OBS to get initial recommendations. Set your bitrate to balance quality and stability—typically between 3000-6000 kbps for HD streams. Choose a resolution and frame rate that match your hardware capabilities; 1080p at 60 fps offers high quality, but 720p at 30 fps is more stable for limited connections. Test different settings before going live to find the best combination. Also, enable hardware encoding if available, as it reduces CPU load. Regularly monitor your stream health and make adjustments as needed to maintain a consistent, high-quality broadcast.

COCERKET VR Headset with Bluetooth Remote for 4.7-7" iPhone Android Phones, HD Aspheric Optical Lens, Adjustable Focus & Pupil Distance, Heat Dissipation Design
【With Bluetooth controller】 Equipped with an advanced Bluetooth controller, these VR headset make it easy to switch between...
As an affiliate, we earn on qualifying purchases.
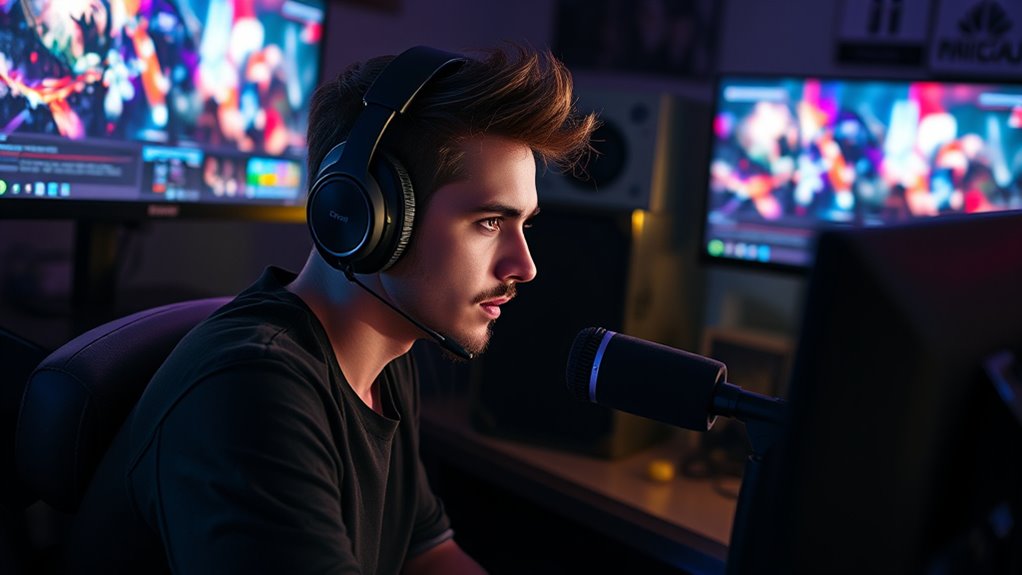
Planning and Preparing Your Streaming Environment

Creating a dedicated and well-organized streaming environment is essential for delivering high-quality broadcasts. You want a space that minimizes distractions and enhances your presentation. Consider lighting, background, and noise levels to guarantee clear video and audio. A clean, appealing background helps viewers focus on you and your gameplay. Using the right equipment, like a good microphone and camera, boosts professionalism. Arrange your setup for easy access to controls and chat management. A thoughtfully designed space can also improve your overall compact living experience, making it more functional and comfortable. Ensuring your workspace supports ergonomic comfort can prevent fatigue and improve your long-term health. Additionally, optimizing your environment for soundproofing can significantly reduce echo and background noise, resulting in clearer audio for your viewers. Proper sound management techniques are crucial for maintaining audio clarity in your streams, especially when considering noise levels and their impact on quality. Here’s a visual to help:
| Aspect | Details |
|---|---|
| Lighting | Soft, even lighting to avoid shadows |
| Background | Tidy, uncluttered with personalized touches |
| Soundproofing | Minimize background noise for clear audio |
| Space Arrangement | Comfortable, accessible for equipment and movement |
Going Live: Starting Your First Broadcast

Before you go live, double-check your equipment setup and make sure your streaming software is properly configured. Once everything is ready, start your broadcast and keep an eye on your stream’s health and chat engagement. Monitoring these elements guarantees a smooth experience for both you and your viewers. Paying attention to craftsmanship ensures your setup maintains a high standard of quality throughout your broadcast. Additionally, integrating smart home automation can help optimize your streaming environment, such as adjusting lighting or temperature for comfort and focus. Being aware of streaming environment best practices can also contribute to a more professional and enjoyable broadcast. Considering environmental factors can further enhance viewer experience and ensure your stream remains consistent.
Equipment Checklist and Setup
To successfully start your first broadcast, you need to gather and set up essential equipment that guarantees smooth streaming and good quality. First, verify your device—be it a PC, console, or mobile—is ready and connected to a stable internet connection, ideally with upload speeds of at least 3-6 Mbps. You’ll need a quality microphone to capture clear audio, headphones to prevent echo, and a webcam if you want to include video of yourself. Consider using a capture card for console gameplay and a second monitor for chat management. Install reliable streaming software like OBS Studio or Streamlabs OBS, and retrieve your Twitch stream key from your dashboard. Finally, set up your lighting, background, and quiet space to optimize your streaming environment.
Software Configuration Steps
Once you’ve set up your hardware and installed your streaming software like OBS Studio or Streamlabs OBS, it’s time to configure the software to go live smoothly. Start by creating scenes that include your gameplay capture, webcam, and microphone inputs. Use the auto-configuration wizard to optimize settings based on your PC and internet speed. Add sources such as game capture, webcam, and overlays to customize your stream’s look. Set your stream title, categories, and tags either through the software or Twitch dashboard for better discoverability. Enable chat and alert integrations to boost viewer engagement. Double-check all settings, run a test stream, and tweak as needed to guarantee smooth performance. This preparation helps prevent issues when you’re live, guaranteeing a professional broadcast from the start. Stream setup efficiency can be improved by organizing your sources and scenes beforehand, saving valuable time during your broadcast. Cut Through Tech Clutter by focusing on high-impact settings and streamlining your setup process. Additionally, understanding your internet connection quality is crucial for maintaining a stable stream and avoiding buffering issues. Incorporating knowledge of audio settings ensures your sound levels are balanced, enhancing overall viewer experience.
Going Live and Monitoring
Starting your first broadcast can be exciting but also nerve-wracking, so it’s important to make sure everything is prepared to go. Before going live, double-check your equipment and software settings. Once you’re live, monitor your stream’s health and chat to keep viewers engaged. Keep an eye on the following:
- Stream bitrate and resolution for smooth playback
- Chat activity to interact with viewers
- Audio levels to ensure clear communication
- Any error messages or dropped frames
- Viewer count and feedback for improvement
Adjust your settings if you notice issues, and respond to chat comments to build rapport. Inviting moderators or guests can enhance the experience. When you’re ready, end the stream calmly and review the recording for future reference.
Managing Stream Interactivity and Viewer Engagement

Managing stream interactivity and viewer engagement is essential for building a loyal community and making your streams more dynamic. You can achieve this by actively chatting with viewers, responding to comments, and acknowledging new followers or subscribers. Use Twitch’s built-in tools like alerts and chat overlays to highlight viewer interactions and create a lively atmosphere. Incorporate polls, Q&A sessions, or mini-games to encourage participation. Setting up commands with chatbots can automate greetings and responses, saving you time while keeping viewers engaged. Consistent interaction makes your audience feel valued and connected, increasing the chances they’ll return regularly. Remember, engaging viewers isn’t just about entertainment—it’s about creating a welcoming environment that fosters community growth and loyalty.
Streaming From Consoles and Mobile Devices

Streaming from consoles and mobile devices allows you to reach your audience without relying solely on traditional PC setups. You can broadcast directly from your gaming console or mobile device, making streaming more accessible. To get started, consider these key points:
- Use the official Twitch app for quick, straightforward streaming from mobile devices.
- On Xbox and PlayStation, enable Twitch streaming through built-in apps, requiring a security code from your Twitch account.
- Connect a capture card to your console and PC for higher-quality streams with advanced features.
- Keep your device’s internet connection stable and upload speed high to prevent lag or disconnections.
- Adjust lighting and background setup to improve your stream’s visual appeal, even on mobile or console platforms.
Growing Your Channel and Building Your Community

To grow your Twitch channel and build a strong community, engaging with viewers consistently and authentically is essential. Respond to chat messages, ask for feedback, and show genuine interest in your audience. Use chat rewards, polls, and calls to action to encourage participation. Customize your channel page with appealing panels, emotes, and alerts that reflect your branding, making viewers feel connected. Regularly plan and announce your streaming schedule so viewers know when to tune in and build anticipation. Analyze your channel’s analytics to understand your audience’s preferences and optimize your content accordingly. Remember to follow Twitch community guidelines and promote a positive environment. Building trust and interaction will turn casual viewers into loyal supporters, helping your channel grow organically over time.
Frequently Asked Questions
How Do I Troubleshoot Common Streaming Software Errors During Broadcast?
When troubleshooting streaming software errors, first check your internet connection and make sure it’s stable and fast enough. Restart your streaming software and update it if needed. Verify your stream key and settings are correct, and test your hardware connections like microphone and webcam. If issues persist, review your logs or error messages for clues, and consider lowering stream quality or bitrate to improve stability during broadcasts.
What Are the Best Practices for Optimizing Stream Quality on Limited Bandwidth?
To optimize stream quality on limited bandwidth, you should lower your stream bitrate and resolution in your streaming software settings. Use a wired internet connection for stability and disable other bandwidth-intensive activities during streaming. Enable adaptive bitrate if available to adjust quality dynamically. Focus on encoding settings like using hardware encoding if your CPU is weak. Regularly monitor your stream health and chat with viewers to catch issues early.
How Can I Prevent Lag and Latency Issues While Streaming?
To prevent lag and latency issues, first guarantee your internet connection is stable with at least 5 Mbps upload speed. Use wired Ethernet instead of Wi-Fi for a more reliable connection. Lower your stream’s bitrate and resolution in your streaming software to match your bandwidth capacity. Close unnecessary background apps, and disable other devices consuming bandwidth during your stream. Regularly monitor your stream’s health and adjust settings as needed to maintain smooth gameplay.
What Are Effective Ways to Moderate Viewer Chat in Real-Time?
You can effectively moderate viewer chat by setting clear rules and using moderation tools. Enable AutoMod in Twitch settings to filter offensive language automatically, and assign trusted moderators to keep chat safe and friendly. Use chat delay features to prevent spam, and regularly monitor conversations. Engage with viewers positively, enforce rules consistently, and utilize chat commands to manage interactions smoothly, creating a welcoming environment for everyone.
How Do I Securely Share My Stream With Multiple Platforms Simultaneously?
You might think sharing your stream on multiple platforms is risky, but using reliable multi-streaming tools proves otherwise. You can connect services like Restream or Streamlabs Multistream, which securely broadcast your feed to Twitch, YouTube, Facebook, and more. These platforms use encrypted connections, keeping your stream safe. Just make certain your accounts are linked properly, enable two-factor authentication, and keep your stream key private to prevent unauthorized access.
Conclusion
Now you’re ready to conquer the streaming universe! With your setup and content plan in place, you’ll captivate viewers and grow your channel faster than a rocket launching into the stratosphere. Remember, consistency and engagement are your secret weapons—so keep streaming, connecting, and evolving. Before you know it, you’ll be a Twitch legend, inspiring countless gamers and creating a community that’s as lively and unstoppable as a wildfire. Happy streaming!